


Amigurumi is a form of Japanese handicraft that involves creating small dolls or three-dimensional objects using crochet or knitting.
This technique has become increasingly popular, allowing artisans to create characters, animals and even religious figures.
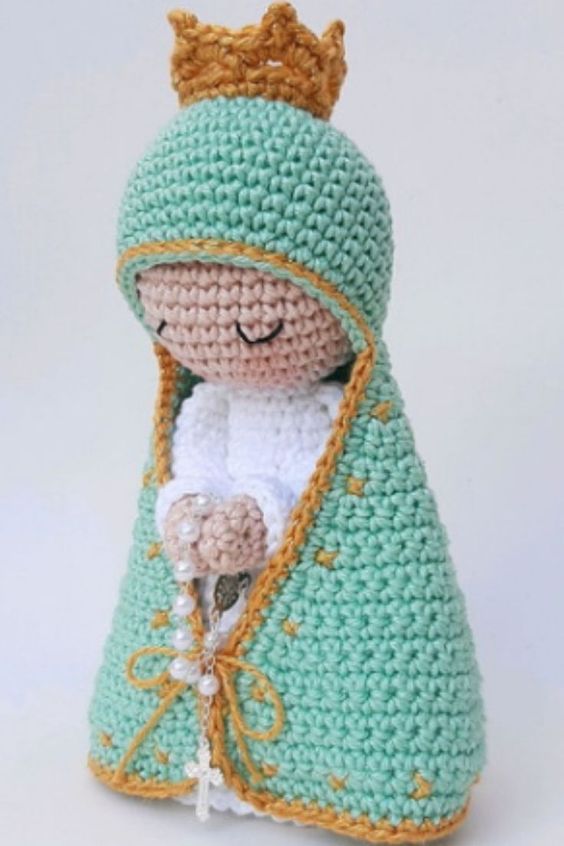
In this article, we’ll explore the process of creating a Our Lady amigurumi, offering a step-by-step guide for crochet enthusiasts looking to make this religious piece.
Necessary materials:
- Cotton thread in suitable colors (blue, white, gold and leather)
- Crochet hook compatible with yarn size
- Filling fiber
- Tapestry needle
- Scissors
- Score markers
- Thread and needle for sewing
Step 1: Choose the pattern
Before starting the Nossa Senhora amigurumi, it is important to find a suitable pattern. There are many online resources like blogs, websites and sharing platforms where you can find free or paid patterns. Be sure to choose a pattern that matches your crochet skill level.
Step 2: Selection of colors
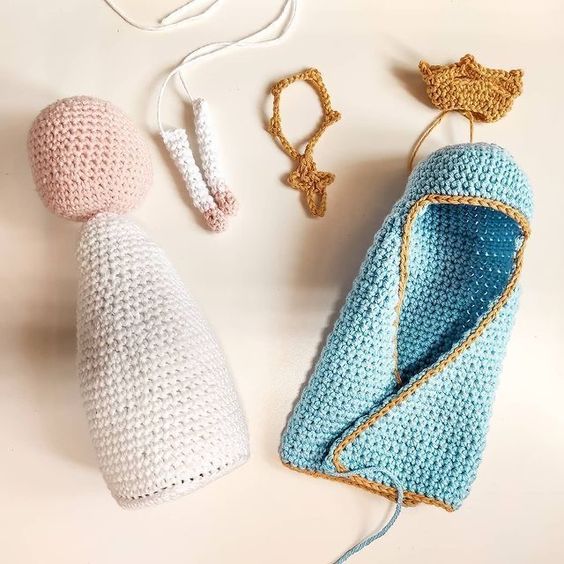
Our Lady is often represented with a blue mantle, a white tunic and golden details. Choose cotton threads in the corresponding colors for each part of the amigurumi. Keep in mind that you will also need a skin color for the figure’s face.
Step 3: Beginning of crochet
Follow the instructions for the chosen pattern to start crocheting Our Lady. Typically, you’ll start with the body or the head, working in a spiral or in separate pieces that will be sewn together later.
Step 4: Shaping the features
As you work your way through the crochet, pay special attention to the details of the face, such as the eyes, nose, and mouth. Use your chosen skin color to create these features. You can choose to embroider the eyes and mouth or use pre-made safety eyes depending on your skill level and preference.
Step 5: Adding Details
After finishing the head and body, it’s time to add the details, like the blue robe and white tunic. Follow the pattern instructions to create these pieces separately and sew them to the amigurumi.
Step 6: Finalization
After sewing all the parts and adding the details, fill the amigurumi with stuffing fiber to add volume and shape to the figure. Be sure to fill in all areas well for a uniform end result.
Step 7: Finishing
After stuffing the amigurumi, close the remaining openings with a tapestry needle and thread of the same color as the thread used. Make sure all the seams are secure and the details are in the right place.
Step 8: Final touches
Now that your Nossa Senhora amigurumi is mostly finished, you can add some finishing touches to enhance the piece. For example, you can embroider gold details on the mantle or add small accessories such as a rosary or a crown. Use your creativity to customize the amigurumi and make it even more special.
Conclusion:
Making an amigurumi of Our Lady is a creative and meaningful way to express your religious devotion through crafts. By following a proper pattern and using the correct crochet techniques, you can create a charming and unique figure that represents the sacred figure. Remember to dedicate time and patience during the creation process, as amigurumi art requires attention to detail. May your figure of Our Lady made in amigurumi bring peace, inspiration and beauty to your life and to those who contemplate it.


")