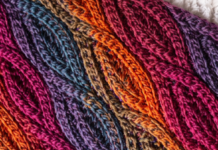
If you enjoy crochet textures that look soft, layered, and visually striking, the Raised Shell Stitch is a beautiful technique worth exploring.
Because it creates delicate 3D scallops, this pattern is perfect for blankets, baby items, scarves, and decorative pieces.
In this guide, you’ll find a clear, beginner-friendly explanation of how to crochet this stunning stitch from start to finish.

What Is the Raised Shell Stitch?
The Raised Shell Stitch — sometimes called the 3D Fan Stitch — forms layered shells that stand up from the fabric, giving your project a rich and elegant texture. Although it looks advanced, it is surprisingly simple once you learn the repeat.
Moreover, it works well with solid colors, ombrés, or multicolored yarns, making it a versatile option for many types of projects.
Materials You Will Need
To begin, gather the following materials:
-
Medium-weight yarn (any color; sample uses pink)
-
Crochet hook compatible with your yarn (4.0 mm–5.0 mm)
-
Scissors
-
Yarn needle
Because this stitch does not require a specific gauge, you can confidently experiment with different yarn and hook sizes.
Abbreviations (US Terms)
Before you continue, review these standard crochet abbreviations:
-
ch – chain
-
sc – single crochet
-
dc – double crochet
-
sk – skip
-
st(s) – stitch(es)
Understanding these abbreviations will help the pattern flow smoothly.
Before You Start: Important Notes
-
The stitch is worked in multiples of 6 + 2.
-
Each shell typically consists of 5 dc, creating the signature fan shape.
-
The 3D effect comes from offsetting shell rows with rows of double crochet.
Because of this structure, the pattern builds beautifully and becomes more striking with each row you complete.
Step-by-Step Raised Shell Stitch Pattern
1. Foundation Chain
First, chain any multiple of 6 + 2 (for example: 38, 44, 50…).
2. Row 1 — Base Double Crochet Row
Next, dc in the 3rd ch from the hook. Continue working dc stitches across the row, then turn your work.
This foundation row gives stability and structure to your shells.
3. Row 2 — First Shell Row
Now begin forming the shells:
-
Ch 1
-
Sc in the first stitch
-
Sk 2 sts, work 5 dc in the next stitch (shell), sk 2 sts, sc in the next stitch
-
Repeat the sequence across
-
End with a sc, then turn
At this stage, you will see your first row of shells forming.
4. Row 3 — Double Crochet Row
To prepare for the next layer of shells:
-
Ch 3 (counts as dc)
-
Dc in every stitch across
-
Turn
This row ensures height and spacing between shell layers.
5. Row 4 — Offset Shell Row (Creates the 3D Look)
To achieve the raised, layered effect:
-
Ch 1
-
Sk the first 3 dc
-
Sc between the first and second shell of the previous shell row
-
Sk 2 sts, work 5 dc in the center space between shells, sk 2 sts, sc
-
Repeat across
-
Turn
Because the shells are staggered here, they form the characteristic 3D texture.
6. Row Repeats
From this point onward, alternate:
-
Row 3 (dc row)
-
Row 4 (offset shell row)
Repeat these two rows until your project reaches the desired length.
Project Ideas Using the Raised Shell Stitch
This stitch works exceptionally well for:
-
Baby blankets
-
Throws
-
Shawls
-
Feminine scarves
-
Cushion covers
-
Bags
-
Textured home décor
Since it’s both durable and decorative, you can use it for practical items or display pieces.
Finishing Your Work
To give your project a polished look:
-
Add a simple single crochet border
-
Or try a scalloped, picot, or lacy edging
These finishing touches frame the shells beautifully and enhance the final result.


