


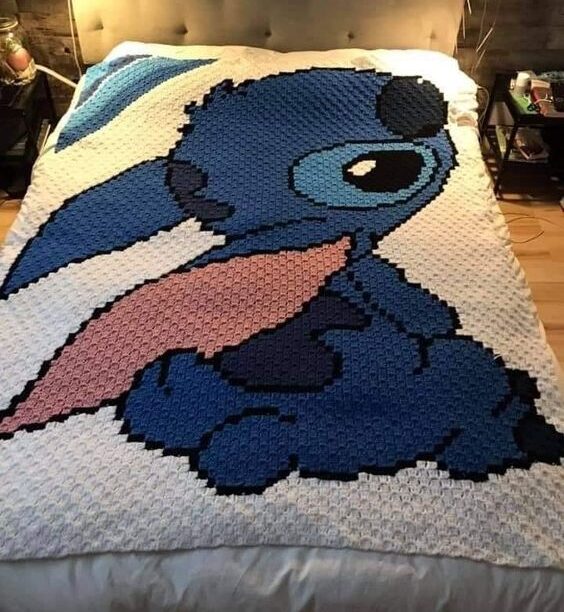
Creating a Stitch-themed crochet blanket is the perfect way to combine your love for Disney’s mischievous little alien with the comfort and warmth of a cozy blanket.
This project is beginner-friendly, yet detailed enough to make a lasting impression as a gift or personal keepsake.
In this article, you’ll find a complete guide to crocheting your own Stitch blanket, along with a free pattern and step-by-step instructions.
Materials You’ll Need
Before you start, gather the necessary materials for the blanket. Here’s what you’ll need:
- Yarn:
- Blue yarn (two shades: one lighter for the background and one darker for Stitch’s features)
- Black yarn for Stitch’s eyes and nose
- White yarn for details like the eyes
- Pink yarn for the ears
- Crochet Hook: Size 5.0mm (H-8) or size appropriate for your yarn
- Tapestry Needle: For sewing parts together and weaving in ends
- Stitch Markers: Helpful for marking rows and keeping track of your place
- Scissors: To cut yarn as needed
Abbreviations (US Terms)
- ch: Chain
- sc: Single crochet
- dc: Double crochet
- hdc: Half double crochet
- sl st: Slip stitch
- st: Stitch
- inc: Increase (two stitches in the same space)
- dec: Decrease (crochet two stitches together)
- FO: Fasten off
Pattern Overview
This blanket features a large depiction of Stitch’s face in the center, with his signature colors of blue and dark blue, along with additional accents like his ears and eyes. The pattern includes basic stitches like single crochet (sc) and double crochet (dc), which makes it perfect for beginners.
We’ll begin by creating the blanket’s base, which is a simple blue background. Then, we’ll add Stitch’s face and features using applique techniques and crocheted pieces.
Blanket Base
Foundation Chain:
- Start by chaining 150 stitches with the lighter blue yarn. The number of chains will determine the width of the blanket, so feel free to adjust the size based on your preference.
Row 1:
- Starting in the second chain from the hook, work 1 sc in each chain across. (150 stitches)
- Ch 1, turn your work.
Row 2-100:
- Sc in each st across. (150 stitches)
- Ch 1, turn your work.
Repeat Row 2 until you have a total of 100 rows, or until the blanket reaches the desired length. This will form the base of the blanket. Once complete, fasten off and weave in any loose ends.
Stitch’s Face and Features
Now that the base of the blanket is complete, we’ll create Stitch’s face using crocheted pieces that will be sewn onto the blanket. You’ll need the darker blue yarn, black yarn, white yarn, and pink yarn for this section.
Stitch’s Face (Dark Blue Yarn)
Face Outline:
- With the darker blue yarn, create a magic ring.
- Round 1: Work 6 sc into the ring. (6 stitches)
- Round 2: Inc in each st around. (12 stitches)
- Round 3: Sc in the next st, inc in the next st, repeat from * to * around. (18 stitches)
- Round 4: Sc in the next 2 sts, inc in the next st, repeat from * to * around. (24 stitches)
- Round 5: Sc in the next 3 sts, inc in the next st, repeat from * to * around. (30 stitches)
- Continue increasing in this pattern until the circle measures approximately 15 inches in diameter. This will form the base of Stitch’s face. Fasten off and leave a long tail for sewing.
Eyes (Make 2)
Eye Whites (White Yarn):
- Start with a magic ring using the white yarn.
- Round 1: Work 6 sc into the ring. (6 stitches)
- Round 2: Inc in each st around. (12 stitches)
- Round 3: Sc in the next st, inc in the next st, repeat from * to * around. (18 stitches)
- Round 4: Sc in the next 2 sts, inc in the next st, repeat from * to * around. (24 stitches)
- Fasten off and leave a long tail for sewing.
Eye Pupils (Black Yarn):
- Start with a magic ring using black yarn.
- Round 1: Work 6 sc into the ring. (6 stitches)
- Round 2: Inc in each st around. (12 stitches)
- Fasten off and leave a long tail for sewing.
Attach the black pupils to the center of the white eye pieces using a tapestry needle. Once both eyes are complete, set them aside for assembly.
Nose
- With black yarn, create a small oval by starting with a chain of 5 stitches.
- Round 1: Sc in the second chain from the hook and in each of the next 3 chains. Work 2 sc in the last chain, then continue around to work sc in the opposite side of the chain. Work 2 sc in the last stitch to form an oval. (10 stitches)
- Round 2: Sc in the next 2 sts, inc in the next st, repeat from * to * around. (14 stitches)
- Fasten off and leave a long tail for sewing.
Ears (Make 2)
Outer Ears (Dark Blue Yarn):
- Start by chaining 10 stitches.
- Row 1: Hdc in the second chain from the hook and across. (9 stitches)
- Row 2-10: Hdc in each stitch across. (9 stitches)
- Continue crocheting rows until the ear measures approximately 5 inches in length.
- Fasten off and leave a long tail for sewing.
Inner Ears (Pink Yarn):
- Follow the same steps as the outer ears, but stop after 7 rows to make the inner ears smaller.
- Sew the inner ears onto the outer ears using the tapestry needle.
Assembly
Now it’s time to bring Stitch to life by assembling the crocheted pieces onto the blanket.
- Attach the Face: Center the dark blue face piece on the blanket and pin it in place. Use the long tail from the face to sew it onto the blanket, ensuring it is secure.
- Attach the Eyes: Position the eyes evenly on the face, with enough space for the nose to fit between them. Sew the eyes in place using the long tails left from the white eye pieces.
- Attach the Nose: Center the nose between the eyes and sew it securely in place.
- Attach the Ears: Sew the ears onto the sides of the head, angling them slightly to create Stitch’s characteristic look.
Once all the pieces are securely attached, weave in any remaining ends and adjust the placement of the features if needed.
Final Touches
You now have your very own Stitch crochet blanket! To add a little more character, consider embroidering some additional details onto Stitch’s face, like his eyebrows or a little smile. You can also add a border around the blanket using a contrasting yarn color to give it a more polished look.
Conclusion
This Stitch crochet blanket is a delightful project for both beginners and more experienced crocheters.
By combining simple crochet techniques with a few creative details, you’ll have a unique and cozy blanket that’s perfect for a Disney fan of any age.
The pattern is flexible, allowing you to adjust the size and design to your liking, and the final product will be a cherished addition to any home.
Happy crocheting!


