


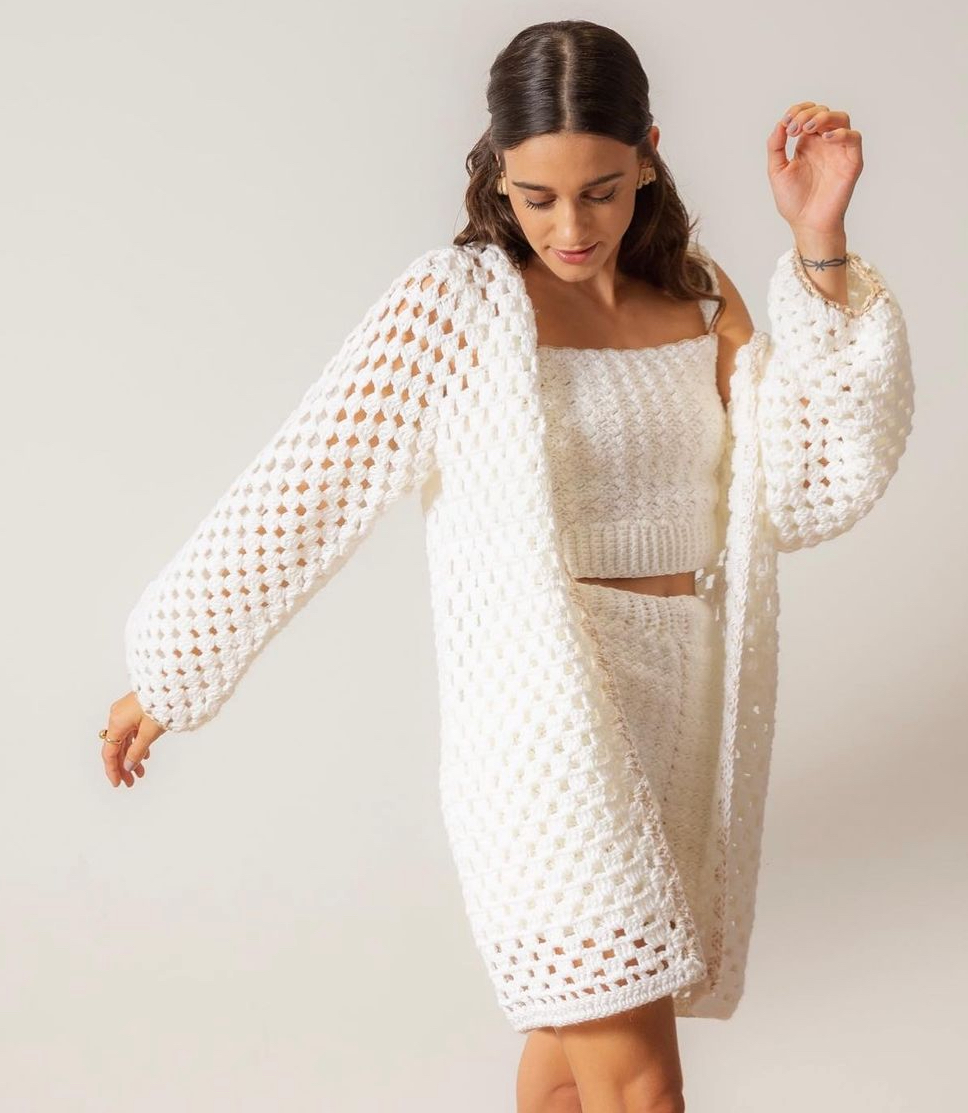
Crocheting a long-sleeve cardigan can be a rewarding project for both beginners and seasoned crocheters.
With its versatility and cozy appeal, a handmade cardigan is a staple piece that can be styled in many ways.
In this guide, we’ll walk you through creating a simple long-sleeve crochet cardigan that is perfect for cooler days.
Materials Needed
Before you start your project, gather the following materials:
- Yarn: Choose a soft, medium-weight (worsted) yarn. For a standard women’s medium-sized cardigan, you’ll need approximately 1200-1500 yards.
- Crochet Hook: A size H/8 (5.0 mm) hook is recommended, but check your yarn’s label for the best hook size.
- Tapestry Needle: For weaving in ends and seaming.
- Stitch Markers: To mark important points in your project.
- Scissors: For cutting yarn.
Gauge and Sizing
Gauge is crucial in crochet to ensure your cardigan fits properly. For this project, a 4×4 inch (10×10 cm) square should equal 14 stitches and 10 rows using double crochet (DC). Make a swatch to check your gauge and adjust your hook size if necessary.
Step-by-Step Instructions
This cardigan is made by crocheting two front panels, a back panel, and two sleeves separately. These pieces are then seamed together. We’ll use basic stitches like the chain (CH), single crochet (SC), and double crochet (DC).
Step 1: Creating the Back Panel
- Foundation Chain: Start by making a foundation chain that matches the width of your back panel. For a medium size, chain 60 (or adjust according to your size and gauge).
- Row 1: Double crochet (DC) in the 4th chain from the hook and in each chain across. Turn your work.
- Row 2-40 (or desired length): Chain 2 (counts as first DC here and throughout), DC in each stitch across. Turn your work.
Adjust the number of rows to match the desired length of your cardigan. Ensure it covers from the base of your neck to the bottom edge.
Step 2: Creating the Front Panels
Each front panel is half the width of the back panel.
- Foundation Chain: Chain 30 (or half the number of your back panel’s chains).
- Row 1: DC in the 4th chain from the hook and in each chain across. Turn your work.
- Row 2-40 (or match the back panel length): Chain 2, DC in each stitch across. Turn your work.
Repeat for the second front panel.
Step 3: Making the Sleeves
The sleeves are worked in rows and then seamed to form a tube.
- Foundation Chain: Chain 40 (or adjust according to your size and gauge for sleeve width).
- Row 1: DC in the 4th chain from the hook and in each chain across. Turn your work.
- Row 2-35 (or desired sleeve length): Chain 2, DC in each stitch across. Turn your work.
Adjust the number of rows for the sleeve length, keeping in mind the ribbing or any cuffs you might want to add later.
Step 4: Assembling the Cardigan
With all your pieces complete, it’s time to assemble the cardigan.
- Join the Shoulders: Lay the back panel flat. Align the front panels on top, matching the top edges. Use a tapestry needle and yarn to seam the shoulders together with a whip stitch or your preferred seaming method.
- Attach the Sleeves: Fold each sleeve in half lengthwise to find the center. Align the center of the sleeve with the shoulder seam and pin in place. Seam the sleeve to the armhole opening. Repeat for the other sleeve.
- Seam the Sides: With the cardigan inside out, seam from the bottom edge of the cardigan up to the armpit, and then continue seaming down the sleeve to the cuff. Repeat on the other side.
Step 5: Adding Finishing Touches
- Edging: To give your cardigan a polished look, add a simple border around the entire opening and bottom hem.
- Attach yarn at the bottom corner of the cardigan.
- SC evenly around the edge, working up the front, around the neck, and down the other front side.
- Optionally, you can do a few more rounds of SC or use a different border stitch pattern for added detail.
- Weave in Ends: Use your tapestry needle to weave in any loose ends from your seaming and finishing.
Tips for Success
- Check Fit as You Go: Regularly check the fit of your panels and sleeves to ensure they meet your desired dimensions.
- Adjust for Personal Fit: Customize the length of the cardigan and sleeves to suit your style. You can make them shorter or longer depending on your preference.
- Use Stitch Markers: Mark key points like the center of the sleeve or the seam lines to keep your pieces aligned during assembly.
- Block Your Pieces: Blocking your panels and sleeves before assembly can help even out stitches and make seaming easier.
Conclusion
Congratulations! You’ve created a beautiful, handmade long-sleeve cardigan. This simple yet stylish project is a perfect introduction to garment-making in crochet.
With practice, you can experiment with different stitch patterns, yarn types, and lengths to make a cardigan uniquely yours. Enjoy wearing your cozy creation or gifting it to a loved one!
Happy crocheting!