The art of quilting is a tradition that goes back centuries. It is a form of artistic expression that allows you to create beautiful functional pieces that can warm and decorate your home. In addition, the technique of making quilts can have a special meaning for many people, as they can be made to celebrate an important occasion or to honor a loved one.
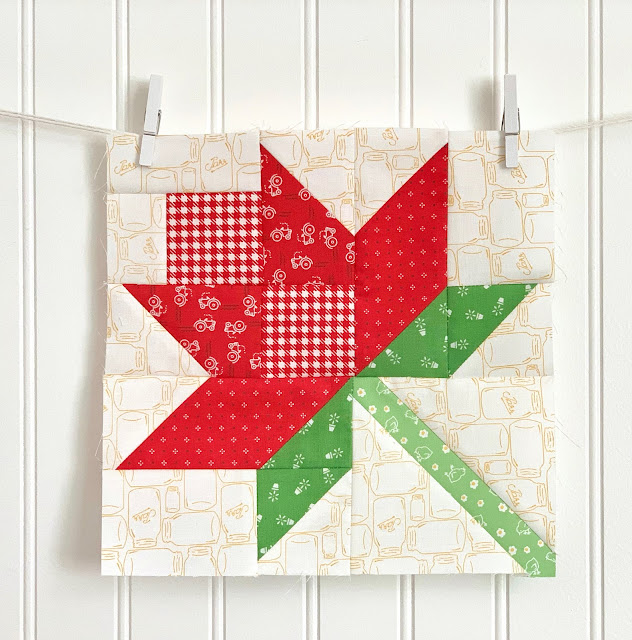
If you’re looking for a beautiful, meaningful, and easy-to-make quilt project, consider making the Hope Flowers quilt. This quilt is a project that is not only visually stunning, but also serves an important purpose – bringing hope and joy to those facing difficult times.
The Hope Flower Quilt is made up of blocks of flowers sewn together to form a complete piece. It is a project that can be customized in the most diverse ways, with different types of fabrics and colors. Then we’ll look at a step-by-step tutorial for creating the Flowers of Hope quilt.
Necessary materials:
Flower fabrics in vibrant colors
Background fabric in neutral color
sewing thread
Ruler and fabric cutter
sewing machine
Scissors
iron
Step 1: Cut the fabrics
Start by cutting the flower fabrics and background fabric into 6.5-inch squares. Make sure each square is neatly cut and free of imperfections. You will need 12 flower squares and 12 background squares for each quilt block.
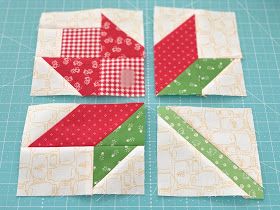
Step 2: Sew the flower squares
Sew four flower squares together to form a strip. Do this with each set of four flower squares until you have three flower strips.
Step 3: Sew the flower strips to the background squares
Now it’s time to sew the flower strips onto the background squares. Place a strip of flowers on top of a bottom square, right sides together. Sew along the edge, with a ¼ inch seam allowance. Repeat the process with the other two flower strips and background squares.
Step 4: Put the Blocks Together
Join two blocks together by sewing them along the shortest sides. Make sure the right sides are together and sew with a ¼ inch seam allowance. Repeat the process until all the blocks are sewn together.
Step 5: Add the border
To finish the quilt, add a border around the blocks. This will help hold all the blocks together and give the quilt a more polished finish. You can choose a fabric color that matches the flowers, or use a neutral color to make the blocks stand out.
Step 6: Finish the quilt
Now it’s time to finish the quilt. Make sure all the blocks have been joined together and the trims have been added, it’s time to finish the quilt. Start by laying out the quilt on a flat, smooth surface to ensure it is evenly aligned. Then pin the edge of the quilt using a pin or marker to ensure it is straight. Finally, sew the edge of the quilt, making sure the seam is tight and even. Congratulations, your quilt is now complete and ready to be used and enjoyed for years to come!