


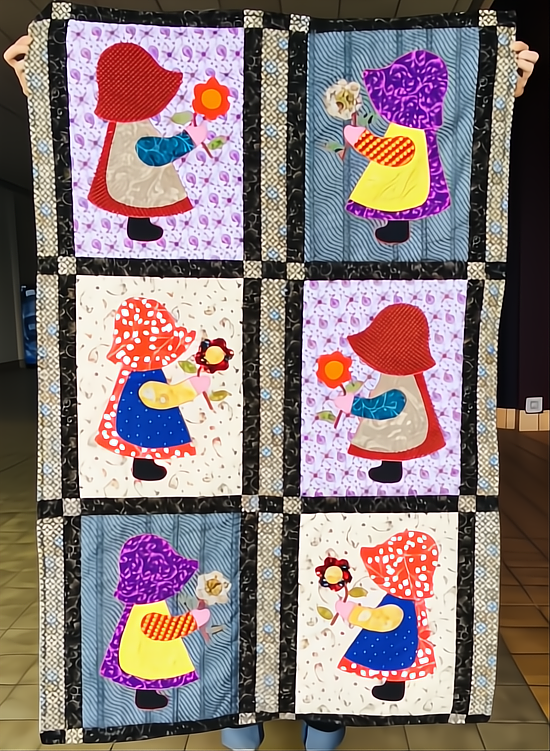
The Sunbonnet Sue quilt pattern is a timeless classic that evokes nostalgia and charm.
In this comprehensive tutorial, we’ll explore how to create a delightful mini quilt using the Sunbonnet Sue pattern.
Whether you’re a seasoned quilter or just starting out, this project is perfect for quilters of all skill levels.
Introduction to Sunbonnet Sue
Sunbonnet Sue is a beloved quilt block pattern that features a charming little girl wearing a bonnet. The design dates back to the late 19th century and has remained popular among quilters for generations. Sunbonnet Sue is often depicted engaged in various activities, such as gardening, playing, or simply enjoying the outdoors.
Materials Needed
Before we dive into the tutorial, let’s gather all the materials you’ll need for this project:
- Fabric scraps in various colors for Sunbonnet Sue and background
- Quilting ruler
- Rotary cutter or fabric scissors
- Sewing machine or needle and thread for hand sewing
- Iron for pressing
- Batting
- Quilt backing fabric
- Quilting pins or clips
Step-by-Step Guide
Now, let’s walk through the process of creating your Sunbonnet Sue mini quilt:
Step 1: Prepare Your Fabrics
Start by selecting fabrics for Sunbonnet Sue’s dress, bonnet, face, and background. You can use traditional calico prints or modern fabrics to suit your style. Cut out the pieces according to the pattern instructions.
Step 2: Assemble Sunbonnet Sue
Begin by sewing together the pieces to create Sunbonnet Sue’s silhouette. Start with the background fabric and layer on the dress, bonnet, and face. Use a sewing machine or hand sew with a whipstitch for a charming, handmade look.
Step 3: Add Details
Once Sunbonnet Sue is assembled, you can add details like eyes, a nose, and hands using embroidery floss or fabric markers. Get creative with embellishments to personalize your Sue and bring her to life.
Step 4: Prepare Background
Next, prepare the background fabric for your mini quilt. Cut it to size and press it to remove any wrinkles. You can choose a solid color or a subtle print that complements Sunbonnet Sue.
Step 5: Layer and Quilt
Layer your backing fabric, batting, and quilt top together, making sure they’re smooth and flat. Pin or clip the layers in place to prevent shifting during quilting. Then, quilt as desired. You can hand quilt or machine quilt, using straight lines or free-motion quilting to add texture and interest.
Step 6: Trim and Bind
Once quilting is complete, trim any excess batting and backing fabric from the edges of your mini quilt. Then, prepare and attach binding strips to finish the edges. You can hand stitch the binding for a polished look.
Step 7: Finishing Touches
Finally, add any final touches to your mini quilt, such as a hanging sleeve or label. Press the quilt one last time to give it a crisp, professional appearance.
Conclusion
Creating a Sunbonnet Sue mini quilt is a delightful project that celebrates tradition and creativity.
Whether you’re a beginner or an experienced quilter, this charming pattern offers endless possibilities for customization and personalization.
So gather your fabrics and supplies, and let’s start stitching our own little piece of quilting history!


