


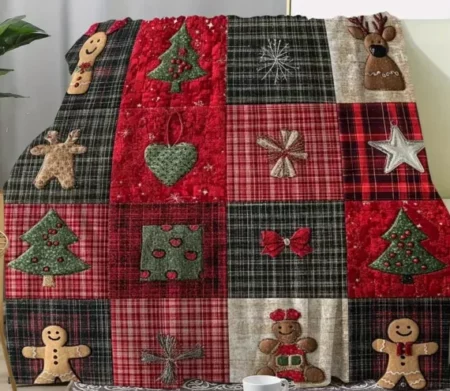
A Vintage Christmas Patchwork Plaid Quilt brings together tradition, warmth, and the charm of handmade holiday décor.
With its cozy plaid blocks and festive patchwork details, this project is perfect for anyone who wants to sew a nostalgic quilt that feels both classic and inviting.
Whether you’re a beginner or an experienced quilter looking for a relaxing Christmas project, this pattern is simple, fun, and wonderfully rewarding.
In this tutorial, you’ll learn everything you need to make your own Christmas plaid quilt — from choosing fabrics to assembling the blocks with clear, beginner-friendly steps.
Materials You Will Need
For a standard throw-size quilt (approx. 55″ × 70″):
Fabric
-
Red plaid fabric – 1 yard
-
Green plaid fabric – 1 yard
-
Cream or white solid fabric – 1½ yards
-
Vintage Christmas print scraps (holly, bells, stars, berries, etc.) – ½ yard total
-
Backing fabric – 3½ yards
-
Binding fabric – ½ yard
Additional Supplies
-
Sewing machine
-
Rotary cutter, cutting mat, quilting ruler
-
Iron and ironing board
-
Pins or clips
-
Batting for quilt
-
Thread (neutral or matching)
Before You Begin: Helpful Tips for Beginners
-
Pre-wash your fabrics. This prevents shrinking after quilting.
-
Use starch spray to keep plaid fabric stable and less stretchy.
-
Cut slowly and check measurements twice. Plaid requires careful alignment.
-
Chain-piece to save time and keep blocks consistent.
Step-by-Step Pattern: Vintage Christmas Patchwork Plaid Quilt
Step 1 – Cut All Fabric Pieces
Start by cutting your pieces in simple, beginner-friendly sizes:
-
Red plaid squares: 30 pieces, 6½” × 6½”
-
Green plaid squares: 30 pieces, 6½” × 6½”
-
Cream solid squares: 40 pieces, 6½” × 6½”
-
Patchwork accent strips:
-
2½” × various lengths, using Christmas print scraps
-
These squares will form the base of your quilt, making the layout easy for beginners to follow.
Step 2 – Create the Vintage Patchwork Accent Blocks
To add festive charm:
-
Take two cream squares.
-
Sew a Christmas print strip between them.
-
Press seams open.
-
Trim back to a 6½” square.
Make 20 of these blocks.
These small details give the quilt its nostalgic “vintage Christmas” look without complicating the process.
Step 3 – Arrange the Quilt Layout
Lay all your blocks on a large table or floor. Create alternating plaid and cream-and-patchwork blocks.
Here’s an easy beginner layout:
-
Row A: Red plaid – Cream – Green plaid – Patchwork – Repeat
-
Row B: Cream – Green plaid – Patchwork – Red plaid – Repeat
-
Continue alternating rows for a soft woven plaid effect.
This arrangement creates a classic Christmas-themed checkerboard that feels warm and traditional.
Step 4 – Sew the Quilt Top
-
Sew blocks together row by row.
-
Press seams in opposite directions for each row to reduce bulk.
-
Join all rows to complete the quilt top.
Because all blocks are the same size, this step is beginner-friendly and goes quickly.
Step 5 – Add the Quilt Layers
Make your quilt “sandwich”:
-
Lay the backing fabric right-side down.
-
Place the batting on top.
-
Center your quilt top right-side up.
-
Smooth out any wrinkles and pin everything together.
Step 6 – Quilt the Layers Together
For beginners, the easiest quilting styles are:
-
Straight-line quilting
-
Diagonal crosshatch quilting
-
Outline quilting around each block
These techniques highlight the plaid design while keeping the sewing simple and relaxing.
Step 7 – Bind the Quilt
Use your binding fabric to create 2½” strips. Sew them around the edges, fold, and stitch down to finish your quilt with a professional look.
Your Vintage Christmas Plaid Quilt Is Ready!
This quilt blends the charm of vintage Christmas décor with the comfort of handmade craftsmanship. It’s perfect for:
-
Holiday decorating
-
Cozying up by the Christmas tree
-
A family keepsake
-
A heartfelt handmade Christmas gift
With simple sewing techniques and easy block construction, beginners can enjoy a festive quilting experience without stress.


