


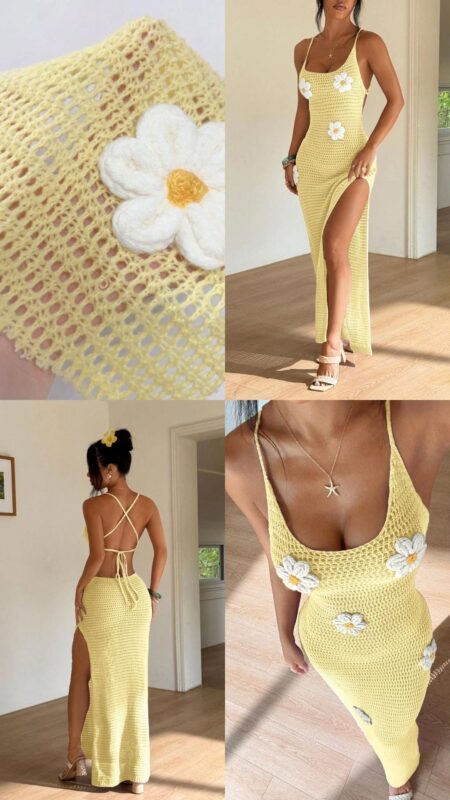
There is something timeless about a handmade crochet dress. When delicate lacework meets dimensional crochet roses, the result is a breathtaking piece that feels both vintage and modern.
The Long Crochet Dress with Roses is a stunning project for crocheters who love feminine fashion, intricate details, and wearable art.
At first glance, this dress may appear advanced. However, when broken down into smaller sections, the construction becomes much easier to understand.
By working step by step, even ambitious beginners can create a beautiful gown inspired by romantic gardens and classic couture designs.
In this tutorial, you’ll learn how to create a long crochet dress decorated with crochet roses, along with helpful tips for achieving a professional-looking finish.
Why Crochet Rose Dresses Are Trending
In recent years, crochet fashion has made a huge comeback. From runways to Pinterest inspiration boards, handmade garments are becoming more popular than ever.
This particular style stands out because it combines:
- Elegant lace crochet
- Three-dimensional floral details
- Feminine silhouette
- Vintage-inspired design
- Handmade luxury appeal
- Perfect wedding and special event styling
Furthermore, crochet roses add texture and visual interest, transforming a simple lace dress into a true statement piece.
Skill Level
Intermediate
Although the stitches themselves are relatively simple, this project requires:
- Consistent tension
- Basic garment shaping
- Lace stitch knowledge
- Assembly skills
Nevertheless, if you’re comfortable with basic crochet techniques and willing to work patiently, you can absolutely create this dress.
Materials You’ll Need
Before starting, gather all your supplies.
Yarn
For the dress:
- Lightweight Cotton Yarn
- Mercerized Cotton
- Bamboo Blend Yarn
- Sport Weight Yarn
Recommended color:
- Ivory
- Cream
- Soft White
- Champagne
For the roses:
- Burgundy
- Deep Red
- Dusty Rose
- Wine
For leaves:
- Olive Green
- Forest Green
- Sage Green
Crochet Hook
- 2.5 mm
- 3.0 mm
- 3.5 mm
The smaller hook helps create clean lace stitches and better garment structure.
Additional Supplies
- Stitch markers
- Measuring tape
- Yarn needle
- Dress form (optional)
- Fabric lining (optional)
Understanding the Construction
Before beginning, it’s important to understand how this dress is built.
The project consists of four main parts:
- Bodice
- Skirt
- Crochet Roses
- Finishing and Assembly
By working section by section, the process becomes much more manageable.
Step 1: Create the Lace Bodice
The bodice forms the foundation of the dress.
Foundation
Chain enough stitches to comfortably fit around the bust.
Join carefully without twisting.
Round 1
Work:
- Double Crochet
- Chain spaces
Repeat around.
This creates the first lace framework.
Round 2
Continue working:
- dc
- ch 1
- skip 1 stitch
Repeat around.
As the rows grow, a beautiful open lace pattern begins to emerge.
Shaping the Bust
Increase slightly along the side panels.
Meanwhile, maintain the lace pattern consistently.
This helps create a flattering fitted silhouette.
Step 2: Create the Waist Section
Once the bodice reaches the natural waistline, begin gentle shaping.
Decrease a few stitches evenly around.
As a result, the dress gains a more defined waist while maintaining comfort.
Additionally, this shaping creates the elegant hourglass appearance seen in many couture crochet dresses.
Step 3: Crochet the Skirt
Now comes the most exciting part.
The skirt gradually expands into a dramatic mermaid-style silhouette.
First Skirt Rows
Continue the lace pattern established in the bodice.
Work evenly for several rounds.
Creating the Flare
Every few rounds:
- Add lace increases
- Expand chain spaces
- Introduce additional stitch groups
Gradually, the skirt begins to flow outward.
This slow expansion prevents the dress from looking bulky.
Instead, it creates graceful movement and elegant drape.
Step 4: Create the Mermaid Hem
The lower portion of the dress features a dramatic flare.
Increase more frequently in the final section.
Consequently, the hem opens beautifully and creates the signature mermaid effect.
This detail adds sophistication and makes the dress especially stunning for formal occasions.
Step 5: Crochet the Roses
The roses are the highlight of this design.
Fortunately, they are much easier to make than they appear.
Rose Foundation
Chain 51.
Row 1
Work:
- 2 dc in each stitch
This creates a ruffled strip.
Row 2
Continue increasing slightly.
The strip naturally begins to curl.
Assembly
Roll the strip tightly from one end.
Secure with yarn.
Instantly, a realistic crochet rose appears.
Repeat until you have multiple roses in varying sizes.
Step 6: Create Crochet Leaves
Leaves add depth and realism.
Basic Leaf
Chain 10.
Work:
- Single Crochet
- Half Double Crochet
- Double Crochet
Along one side.
Then repeat on the opposite side.
Fasten off.
Make several leaves for each flower cluster.
Step 7: Attach Roses and Leaves
This is where the dress truly comes to life.
Arrange flowers organically throughout the garment.
Avoid perfectly symmetrical placement.
Instead, scatter the roses naturally.
As a result, the finished dress resembles a blooming rose garden.
Optional Lining
Because lace crochet is openwork, many makers choose to add a lining.
Options include:
- Satin lining
- Stretch knit lining
- Nude slip dress
- Matching camisole and skirt set
Not only does this increase comfort, but it also enhances the overall elegance of the finished garment.
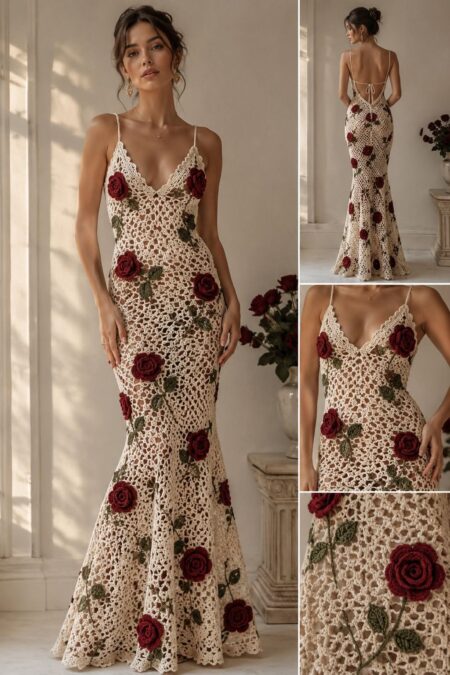
Best Color Combinations
While the image features ivory and burgundy roses, other combinations can be equally beautiful.
Romantic Garden
- Ivory
- Burgundy
- Olive
Bridal Elegance
- White
- Pearl
- Soft Green
Vintage Rose
- Cream
- Dusty Rose
- Sage
Modern Luxury
- Black
- Deep Red
- Emerald
Styling Ideas
This crochet dress works beautifully for:
- Weddings
- Engagement Photos
- Garden Parties
- Beach Ceremonies
- Bridal Showers
- Special Events
- Photoshoots
Moreover, the handmade details ensure every piece feels unique and memorable.
Beginner-Friendly Tips
Although this is a large project, these tips can help significantly.
Measure Frequently
Try on the dress regularly.
This prevents sizing issues later.
Block Each Section
Blocking improves stitch definition and overall appearance.
Use Stitch Markers
Markers help maintain shaping and symmetry.
Make Roses Last
Attach flowers securely with multiple stitches.
This ensures durability during wear.
Final Thoughts
The Long Crochet Dress with Roses is more than just a crochet project—it is a wearable piece of art. Thanks to its delicate lace construction, dimensional flowers, and elegant silhouette, this design captures the beauty of handmade fashion in a truly unforgettable way.
Although the project requires patience, every stitch contributes to a stunning final result. Moreover, the customizable colors and floral arrangements allow you to create a dress that reflects your own style and creativity.
If you’re ready to challenge yourself with a memorable crochet fashion project, this romantic rose dress may become one of the most rewarding pieces you ever make.