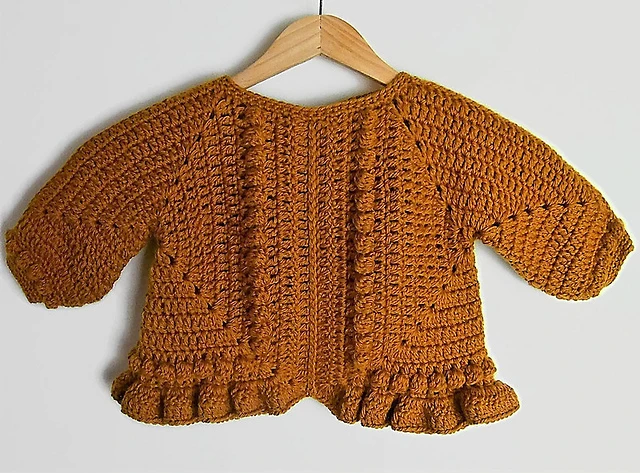
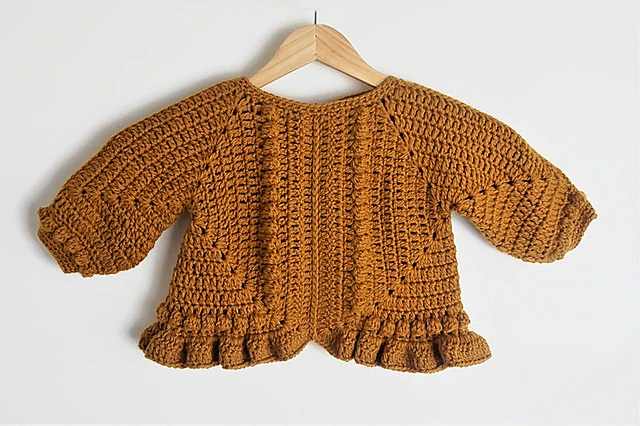
Crochet is a versatile craft skill that allows you to create a multitude of pieces, including children’s clothing. Among the many options of crochet clothes for the little ones, the granny square children’s sweater is a popular and charming choice. In this article, we’ll explain the crochet pattern to create a granny square kids sweater, a fun and rewarding project that will result in a unique and lovingly crafted outfit for kids.
The granny square is one of the most well-known and widely used crochet patterns. It is a square formed by a sequence of basic crochet stitches, such as chains, single crochets and double crochets, arranged in a geometric pattern. These squares are then joined together to create a larger piece, such as a blanket, pillow or, in this case, a children’s sweater.
Before you start designing the granny square sweater for kids, it’s important to choose the right size and yarn. You can use woolen or cotton yarn, depending on the season and personal preference. Be sure to choose a quality yarn that is soft and comfortable for children’s sensitive skin.
Here is a basic crochet pattern for creating a granny square kids sweater:
Necessary materials:
- Yarn of your choice in different colors for the granny squares
- Crochet hook of the appropriate size for the chosen yarn
- Scissors
- Tapestry needle for sewing granny squares
- Buttons (optional)
Step 1: Make the granny squares Start by making the granny squares in different colors. You can choose any size you like depending on the style you want the sweater to be. A common size is about 10-15 cm on a side. Follow a basic granny square pattern, which usually involves chaining a starter, forming a ring with a slip stitch, then working a sequence of basic crochet stitches to create the corners and sides of the square. Make as many granny squares as needed for your desired sweater size.
Step 2: Join the granny squares Once you’ve made the granny squares, it’s time to join them together to create the body part of the sweater. Use a tapestry needle and the same thread used to make the granny squares to sew them together. You can use the blind stitch technique, passing the hook through the crochet stitches on the back of the squares and joining them with basting stitches or single crochets. Continue joining the granny squares together until you have the desired width for the body part of the sweater.
Step 3: Make the sleeves After joining the granny squares to form the body part of the sweater, it’s time to make the sleeves. Choose an area where you want the sleeves to start and attach the yarn to start working.
Then work a sequence of basic crochet stitches into one of the openings created by the granny squares, forming the first row of the sleeve. Continue working in circular rows until you reach the desired length for the sleeve, remembering to make any necessary increments to create the conical shape of the sleeve. Repeat the process to make the second sleeve.
Step 4: Make the collar Once you’ve made the sleeves, it’s time to make the sweater’s collar. Choose an opening on the upper body of the sweater and attach the yarn to start working. You can opt for a crew neck, V-shape, or any other style you prefer. Work in circular rows, following your chosen basic crochet stitch pattern, until you reach the desired width and height for the collar.
Step 5: Finishing Once you’ve completed the collar, it’s time to finish the sweater. You may choose to make a simple single crochet border around the edges of the sweater, including the sleeves and bottom of the body, to give it a clean, polished finish. Also, you can add buttons on the front of the sweater to close it if you like.
Step 6: Blocking and Finishing Finally, it’s important to block the sweater to ensure it retains its shape and has a professional finish. To do this, fill a sink or bucket with warm water and a little mild soap and gently dip the sweater into it. Then squeeze out excess water by gently pressing with a towel and lay the sweater out on a flat surface, molding it into the desired shape. Let the sweater dry completely before handling it again.
In summary, the crochet pattern for a toddler granny square sweater involves creating the granny squares in different colors, joining the squares together to form the body part of the sweater, sewing the sleeves, creating the collar, trimming and the lock for completion. It’s a fun and rewarding project that allows you to create a unique and enchanting piece for children. With some practice and patience, you will be able to create beautiful crochet baby sweaters for your little ones with the granny square pattern. Remember to choose quality yarn, follow the pattern instructions, and enjoy the creative process. Good luck!