


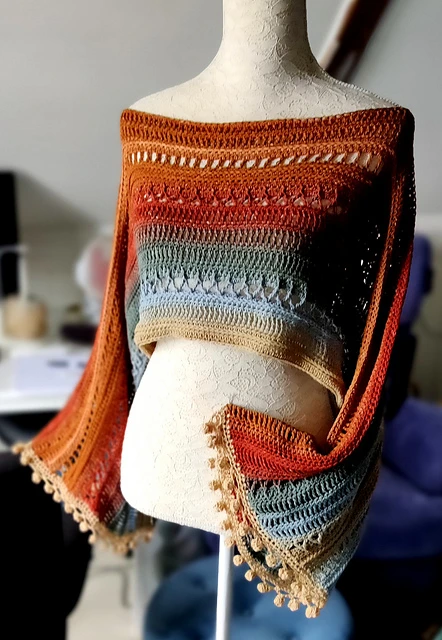
How to crochet the Madison Shoulder Band pattern
Crochet is a form of handicraft that allows the creation of a wide variety of pieces, from clothes to accessories. A popular crochet pattern is the Madison Shoulder Sash, which is an elegant and versatile piece that can be used to add a touch of style to your wardrobe. If you are a crochet enthusiast or are interested in learning, here is a step by step on how to make the Madison Shoulder Band crochet pattern.
Necessary materials:
Crochet yarn of your choice in a color of your choice
Crochet hook the right size for the chosen yarn
Scissors
Tapestry needle for finishing
Step 1: Choosing Your Yarn and Hook The first step in making the Madison Shoulder Band is choosing the right crochet yarn and hook. You can choose any yarn you like as long as it is appropriate for the crochet hook you select. Generally, the yarn package will indicate which needle size is recommended. Make sure the selected crochet hook is compatible with the chosen yarn to get the desired result.
Step 2: Start of work To start, make a slip knot at the end of the yarn and put it on the crochet hook. Then chain 17 stitches, plus 3 chains to go up, which will count as the first double crochet in the pattern.
Step 3: Double Dots Pattern The Madison Shoulder Band is mostly made up of double crochets. Below you will find the double crochet pattern to create the stripe:
Round 1: Crochet 1 double crochet in each chain, starting on the fourth chain from hook. Totaling 15 high points.
Round 2: Chain 3 to go up (which counts as the first double crochet), skip the first double crochet on the previous row and crochet 1 double crochet in each of the next 14 double crochets. At the end of this row you will have 15 double crochets.
Repeat Row 2 until you reach the desired length for the band. Remember to count the double crochets to ensure you are following the pattern correctly.
Step 4: Finishing When the strip is the desired size, cut the thread and finish off the work. To do this, thread the yarn through the last double crochet and pull to close. Then, use a tapestry needle to tuck the loose ends of the yarn inside the headband, ensuring they are securely tucked in.
Step 5: Personalization (optional) If you wish, you can customize your Madison Shoulder Sash by adding embellishments or extra details to make it unique. For example, you can add buttons, pearls, bows, or even crochet a decorative border around the headband for a special touch. Use your creativity and personal style to customize the Madison Shoulder Band to your preferences and match your specific outfits or occasions.
Now that you have completed the Madison Shoulder Band crochet pattern, you can enjoy a stylish, handcrafted piece to add to your wardrobe. This headband is versatile and can be worn in a variety of ways, such as around the shoulders, around the waist, or as a headband, adding a touch of style and sophistication to your look.
In addition, crocheting is a creative and relaxing activity that can be a great form of occupational therapy, as well as being a unique way to gift someone special with a handcrafted piece made with love.
We hope this step by step was helpful for you to learn how to crochet the Madison Shoulder Band pattern. With practice and patience, you’ll be able to hone your crochet skills and create beautiful pieces for personal use or even for sale. Have fun with your crochet project and create beautiful pieces with your own hands!


