


If you’re looking for a cozy, textured blanket that feels both modern and timeless, the Waffle Stitch Throw is a perfect choice.
Not only does it create a beautifully raised pattern, but it’s also surprisingly beginner-friendly once you understand the basics.
In this guide, you’ll learn exactly how to crochet a waffle stitch blanket step by step. Plus, I’ll share helpful tips, transitions, and SEO-friendly insights to help your project turn out amazing.
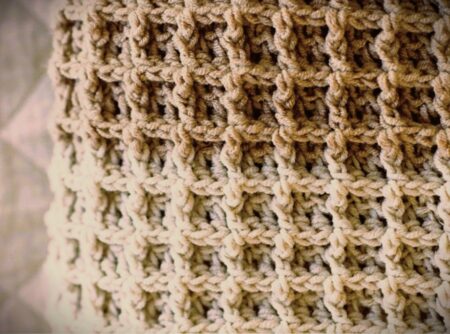
✨ What Is the Waffle Stitch?
The waffle stitch crochet pattern is known for its deep, grid-like texture that looks similar to a waffle. This effect is created using a combination of double crochet (dc) and front post double crochet (fpdc) stitches.
As a result, the fabric becomes thick, squishy, and perfect for blankets—especially during colder months.
🧵 Materials You’ll Need
Before you begin, gather your supplies:
- Medium weight yarn (worsted weight #4 is ideal)
- Crochet hook (usually 5.5 mm / I-9)
- Scissors
- Yarn needle
👉 Tip: Soft acrylic or cotton blends work best for a cozy waffle stitch throw blanket.
📏 Pattern Overview
- Skill Level: Beginner to Easy Intermediate
- Stitch Pattern: Multiple of 3 + 2
- Technique: Repeating rows
🪄 Abbreviations (US Terms)
- ch = chain
- dc = double crochet
- fpdc = front post double crochet
- st = stitch
🧶 Step-by-Step Instructions
1. Start with the Foundation Chain
First, chain a multiple of 3, then add 2 extra chains.
👉 Example: ch 92 (90 + 2)
2. Row 1 – Base Row
Now, work 1 dc in the 3rd chain from the hook and in each stitch across.
This creates a smooth base for your waffle texture.
3. Row 2 – Creating Texture
Next, ch 2 and turn your work.
- 1 dc in the first stitch
- 1 fpdc in the next stitch, 2 dc in the next two stitches
- Repeat from * to * across
- Finish with 1 dc in the last stitch
At this point, you’ll start seeing the raised texture forming.
4. Row 3 – Building the Waffle Pattern
Then, ch 2 and turn again.
- 1 dc in the first stitch
- 2 fpdc in the next two stitches, 1 dc in the next stitch
- Repeat across
- End with 1 dc
👉 Notice how the pattern alternates? That’s what creates the waffle look.
5. Repeat Rows
Continue alternating Row 2 and Row 3 until your blanket reaches your desired length.
6. Finishing
Finally, fasten off and weave in all loose ends using a yarn needle.
🛏️ What Your Blanket Will Look Like
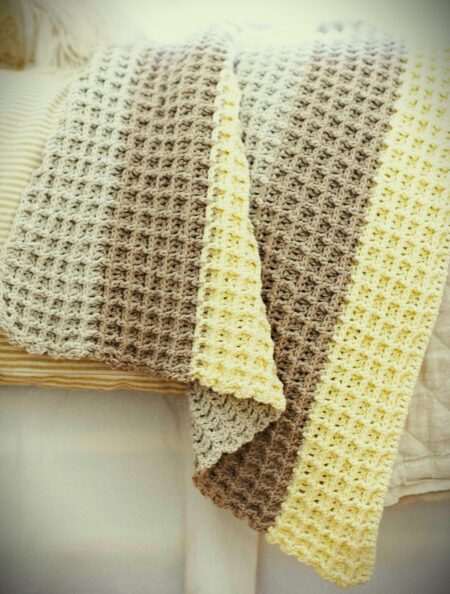
Once completed, your waffle stitch throw blanket will have a rich texture that looks stunning on a bed, sofa, or reading nook.
💡 Beginner Tips for Success
- First of all, keep your tension consistent
- Additionally, practice fpdc on a small swatch before starting
- Don’t rush—this stitch becomes easier with repetition
- Most importantly, count your stitches at the end of each row
🔥 Why This Pattern Is So Popular (SEO Insight)
The waffle stitch crochet blanket pattern is trending because:
- It creates a high-end, textured look
- It’s beginner-friendly with repetition
- It works well for gifts and home decor
- It performs extremely well on Pinterest
👉 Keywords to target:
- waffle stitch crochet blanket
- easy crochet throw pattern
- textured crochet blanket
- beginner crochet blanket tutorial
🧡 Final Thoughts
In conclusion, the Waffle Stitch Throw is a beautiful and practical project that combines simplicity with elegance. Even if you’re just starting your crochet journey, you’ll find this pattern easy to follow and incredibly rewarding.
So, grab your yarn, start stitching, and enjoy creating your own cozy masterpiece!