


Quilting is not only a craft but an art form that allows individuals to express their creativity and warmth through fabric.
For beginners dipping their toes into the world of quilting, the Hexagon Treehouse Quilt pattern offers a perfect starting point.
In this comprehensive guide, we’ll delve into the Hexagon Treehouse Quilt pattern, exploring its simplicity, versatility, and offering step-by-step instructions for beginners to create their own cozy masterpiece.
Introduction to the Hexagon Treehouse Quilt Pattern
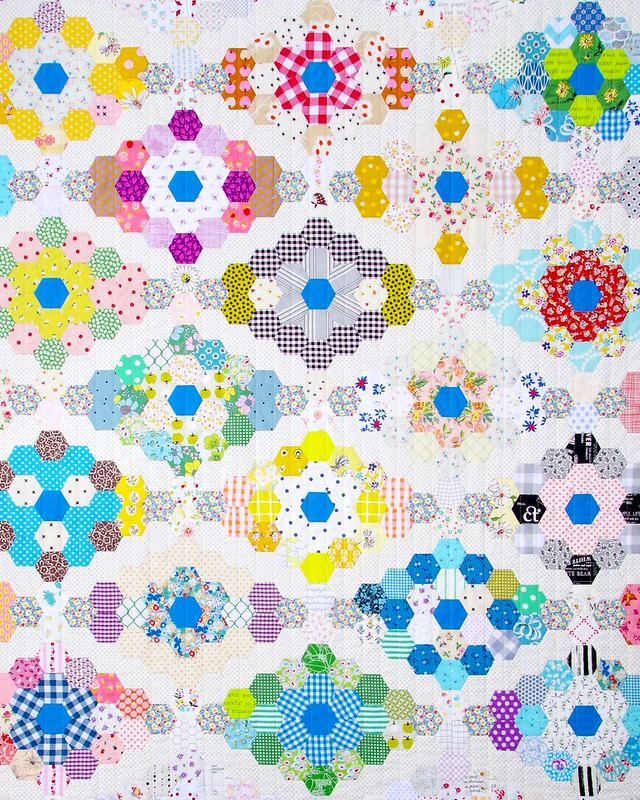
The Hexagon Treehouse Quilt pattern is a charming design that evokes feelings of coziness and comfort, reminiscent of a quaint treehouse nestled in the woods.
Its hexagonal shape adds visual interest and allows for endless creative possibilities in fabric selection and arrangement.
Whether you’re a novice quilter or an experienced crafter, this pattern is perfect for anyone looking to create a timeless and inviting quilt.
Pattern Overview
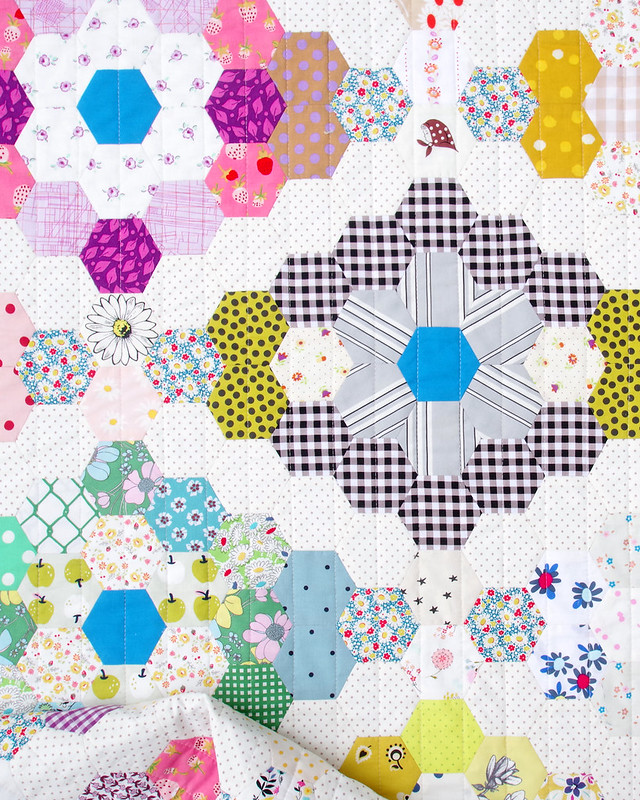
The Hexagon Treehouse Quilt pattern consists of hexagon-shaped blocks arranged in a honeycomb-like pattern.
Each hexagon block is created by sewing together smaller fabric pieces, known as hexagon units, to form a cohesive design. The pattern can be customized in terms of size, color scheme, and layout, making it suitable for quilters of all skill levels.
Materials Needed
Before diving into your quilting project, gather the following materials:
- Fabric in various colors and patterns
- Hexagon template (available online or create your own)
- Scissors or rotary cutter
- Quilting ruler
- Sewing machine
- Thread
- Iron and ironing board
- Quilt batting
- Quilt backing fabric
- Quilting pins or clips
Step-by-Step Instructions
1. Cutting Fabric
Begin by cutting fabric into hexagon shapes using your template. You can choose to cut all hexagons from the same fabric or mix and match for a more eclectic look.
2. Creating Hexagon Units
Sew hexagon units together by aligning the edges of two hexagons with right sides facing each other and stitching along one edge using a ¼-inch seam allowance. Continue adding hexagons until you have a row. Press seams open or to one side.
3. Assembling Hexagon Blocks
Arrange your hexagon units into a pleasing layout, experimenting with different color combinations and patterns. Once satisfied, sew the hexagon units together to form complete hexagon blocks.
4. Assembling the Quilt Top
Arrange your hexagon blocks into rows, ensuring a balanced distribution of colors and patterns. Sew the blocks together row by row, pressing seams as you go to create a smooth surface.
5. Adding Borders (Optional)
If desired, add borders to your quilt top to frame the design and provide a finished look. Measure and cut border strips to fit the edges of your quilt, then sew them in place.
6. Quilting and Finishing
Layer your quilt top, batting, and backing fabric, then baste together using quilting pins or clips.
Quilt as desired, either by hand or using a sewing machine, to secure the layers together. Finally, trim any excess fabric and bind the edges of your quilt to complete the project.
Conclusion
The Hexagon Treehouse Quilt pattern offers beginners a wonderful introduction to the world of quilting, allowing for creativity and experimentation while creating a cozy and inviting quilt.
With its simple construction and endless design possibilities, this pattern is sure to inspire quilters of all skill levels to embark on their own quilting journey. So gather your fabrics, templates, and sewing supplies, and let the quilting adventure begin!


