


.Quilting is an art form that has captivated people for generations, offering a creative outlet and a way to express oneself through fabric and thread.
For beginners eager to embark on their quilting journey, the “Around the World” quilt pattern is an excellent starting point.
In this comprehensive guide, we will explore the “Around the World” quilt pattern, discussing its simplicity, versatility, and providing step-by-step instructions for beginners to create their own stunning quilt.
Introduction to the Around the World Quilt Pattern
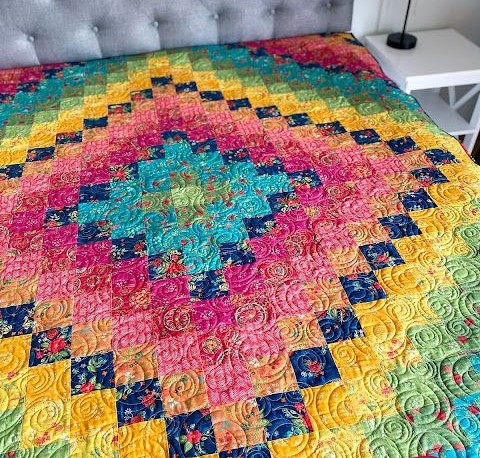
The “Around the World” quilt pattern is a classic design that features a series of colorful blocks arranged in a concentric layout, creating the illusion of a globe or map.
With its simple yet striking design, this pattern is perfect for beginners who are new to quilting and eager to experiment with color and layout.
Pattern Overview
The “Around the World” quilt pattern consists of a series of square blocks, each featuring a different fabric or color.
These blocks are arranged in a circular or square layout, with each row representing a different “stop” on a journey around the world. The pattern can be customized in terms of size, color scheme, and layout, making it suitable for quilters of all skill levels.
Materials Needed
Before starting your quilting project, gather the following materials:
- Fabric in various colors and patterns
- Quilting ruler
- Rotary cutter or fabric scissors
- Sewing machine
- Thread
- Iron and ironing board
- Quilt batting
- Quilt backing fabric
- Quilting pins or clips
Step-by-Step Instructions
1. Choose Your Fabrics
Start by selecting fabrics for your quilt. Consider using a variety of colors and patterns to create visual interest and contrast in your quilt blocks.
2. Cut Your Fabric
Using your quilting ruler and rotary cutter or fabric scissors, cut your fabric into squares of equal size. The size of your squares will determine the finished size of your quilt blocks.
3. Arrange Your Blocks
Once you have cut your fabric squares, arrange them in a pleasing layout on your design wall or work surface. Experiment with different color combinations and arrangements until you find a layout that you love.
4. Sew Your Blocks Together
Once you are happy with your layout, sew your fabric squares together to create your quilt blocks. Use a ¼-inch seam allowance and press your seams open or to one side for a professional finish.
5. Assemble Your Quilt Top
Once all of your blocks are sewn together, assemble them into rows according to your chosen layout. Sew the rows together to create your quilt top, pressing your seams as you go.
6. Quilt and Finish
Layer your quilt top, batting, and backing fabric, then baste together using quilting pins or clips. Quilt as desired, either by hand or using a sewing machine, to secure the layers together. Finally, trim any excess fabric and bind the edges of your quilt to complete the project.
Conclusion
The “Around the World” quilt pattern is a wonderful choice for beginners looking to dip their toes into the world of quilting.
With its simple yet striking design and endless possibilities for customization, this pattern offers a fun and rewarding quilting experience for quilters of all skill levels.
So gather your materials, choose your fabrics, and let’s embark on a quilting adventure “Around the World”!


